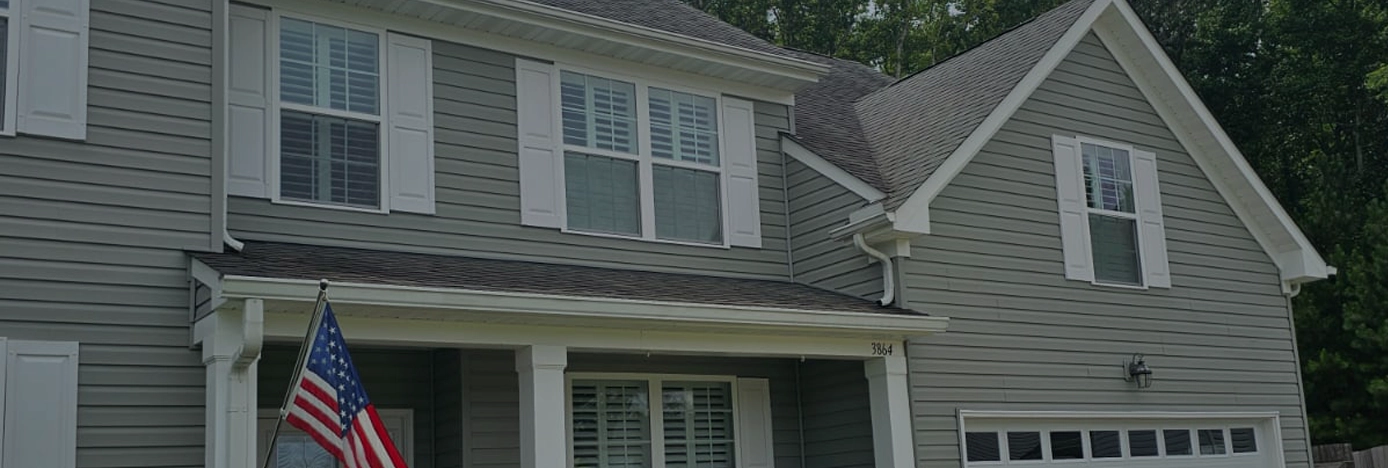
About Exterior Home Painting
Exterior home painting is more than just a cosmetic upgrade; it’s a crucial step in protecting and preserving your house. A fresh coat of paint not only enhances curb appeal but also serves as a barrier against weather elements, preventing damage to the structure. Homeowners often underestimate the complexity of painting the exterior of a house, leading to subpar results and potential long-term issues.
To achieve professional-looking results, proper preparation is key. This article will guide you through essential steps to prepare your house for exterior painting like a pro.
From safety precautions and thorough cleaning to repairing damages and priming surfaces, we’ll cover everything you need to know to ensure a successful and long-lasting paint job. Whether you’re planning to tackle the project yourself or hire an exterior house painter, understanding these preparation techniques will help you achieve the best possible outcome for your home’s exterior.
Safety First: Lead Testing and Precautions
- Identifying Lead Paint
Lead-based paint poses serious health risks, particularly for young children and pregnant women. In the United States, an estimated 89% of homes built before 1978 have had lead-based paint. To ensure safety, it’s crucial to identify the presence of lead paint before beginning any exterior painting project.
Homeowners have several options for lead testing. While home lead test kits are convenient, they are not as reliable as professional methods. For accurate results, it’s recommended to use either X-Ray Fluorescence (XRF) testing or paint chip sampling. XRF testing uses a handheld device to measure lead content without damaging surfaces, while paint chip sampling involves removing small paint samples for laboratory analysis.
- Safety Equipment
When working with lead paint, proper safety equipment is essential to protect against exposure. The following items are necessary:
1.Safety glasses or goggles
2. Gloves (cotton, leather, or chemical-resistant rubber)
3. Disposable coveralls
4. Disposable respirator
5. Ear plugs
For respiratory protection, the type of equipment required depends on lead concentration levels. As lead concentrations increase, more advanced respiratory protection becomes necessary.
- Proper Disposal Methods
Proper disposal of lead-contaminated materials is crucial to prevent environmental contamination. The EPA requires that waste from lead-based paint renovation activities be contained to prevent the release of dust and debris. This includes materials such as protective sheeting, HEPA filters, dirty water, cloths, and protective clothing.
At the end of each workday and upon completion of the renovation, waste must be transported and stored in a manner that prevents dust and debris release. It’s important to note that disposal regulations may vary by state and locality. While most residential renovation waste is classified as non-hazardous at the federal level, some states may have more stringent requirements.
To ensure compliance with all applicable regulations, it’s advisable to consult with a hazardous waste disposal company. These companies can help determine the appropriate disposal method and provide documentation of proper disposal for your records.
Thorough Cleaning and Surface Preparation
- Pressure Washing Tips
Pressure washing is an essential step in preparing a house for exterior painting. To avoid damage, it’s recommended to use an electric-powered pressure washer with a maximum PSI of 1,500. A wide spray nozzle is preferable to a narrow one, as it covers more surface area and reduces the risk of damage. When pressure washing, always start from the top and work downwards to prevent dirty residue from trickling onto cleaned areas. Maintain a distance of about 6 inches from the surface and aim the nozzle slightly downward to prevent water from being forced into the building.
- Removing Loose Paint
Scraping off loose paint is crucial for a successful paint job. Use a stout scraper with a 2.5 to 3-inch wide, two-sided blade for larger areas, and a smaller scraper with a 1-inch blade for tight corners. A flexible putty knife can help lift the edges of peeling paint. When scraping, it’s important to remove all loose paint without gouging into the wood. If an edge doesn’t pop off after a couple of passes, move on to avoid damaging the surface.
- Sanding Techniques
Sanding serves to remove imperfections and roughen glossy surfaces for better paint adhesion. For wood surfaces, start with coarse aluminum oxide or garnet sandpaper and progress to finer grits (80, 120, 180, 220), always sanding with the grain. For metal surfaces, use silicon carbide sandpaper, starting coarse and ending with 100-150 grit, sanding in a circular motion. When sanding painted surfaces, use a circular motion to smooth the edges of the old paint job. Remember to remove dust regularly and replace sandpaper when it becomes encrusted.
Repairing Damages and Imperfections
- Fixing Wood Rot
Wood rot poses a significant threat to homes, particularly in areas exposed to moisture. There are three main types of wood rot: white rot, brown rot, and soft rot. White rot, caused by fungi called lignin, makes wood soft and spongy, thriving in temperatures between 60 to 90 degrees Fahrenheit. Brown rot, often mistakenly called dry rot, causes wood to chip and break apart, despite still containing at least 20% moisture. Soft rot, the most resilient type, grows in both hot and cold temperatures and affects wood both inside and outside the home.
- Filling Holes and Cracks
To repair small holes and cracks, start by cleaning the area with a vacuum or brush. For larger holes and gouges, use a two-part resin filler, which adheres better to wood than other fillers. Small, shallow blemishes can be filled with exterior spackling compound, while cracks can be filled with exterior caulk after priming. For plaster walls, widen the crack if it’s less than 1/4 inch wide, then apply joint compound. For concrete walls, enlarge the crack with a chisel and hammer, clean it thoroughly, and apply a concrete bonding adhesive before filling with concrete patching material.
- Replacing Damaged Siding
When dealing with damaged siding, assess whether a full replacement or a partial repair is necessary. For rotted windowsills, for example, one can either replace the entire sill or cut out the rotted part and replace it with a wooden patch. Before applying any filler or epoxy, grind out any rotted wood to reach solid wood, as epoxy won’t bond to rotted material. When using epoxy, remember that it flexes with the wood, preventing separation as the wood expands and contracts.

Priming for Success
- Types of Primers
Primers play a crucial role in creating a strong foundation for paint adhesion. There are two main types of primers: water-based (acrylic) and oil-based (alkyd). Water-based primers offer easier application, water clean-up, and fewer environmental considerations. They are suitable for most surfaces, including wood, laminate, and metal. Oil-based primers, on the other hand, provide superior stain blocking and are ideal for tannin-rich woods, rust, smoke, or water stains.
- Application Methods
To apply primer effectively, start by power washing the exterior to remove dirt and loose paint. Use a scraper to remove any flaking or peeling paint. Apply the primer evenly using a brush, roller, or sprayer, following the manufacturer’s instructions. For larger areas, a roller can be efficient, while a 2-inch brush works well for interior trim.
- Spot Priming vs. Full Coverage
Spot priming is ideal for covering repairs or previously unpainted sections. It helps create a uniform finish when the new paint is applied. Full coverage priming is necessary for bare substrates, surfaces with rust or stains, dramatic color changes, or hard-to-coat substrates like plastic or high-gloss surfaces. When priming a previously painted surface, identify the type of coating used to select the best primer and paint for the job.
Conclusion
Proper preparation is key to achieving a professional-looking and long-lasting exterior paint job. From safety precautions and thorough cleaning to repairing damages and priming surfaces, each step has a significant impact on the final result. By following these guidelines, homeowners can ensure a successful painting project that not only enhances the look of their house but also protects it from the elements.
Whether you’re planning to tackle the job yourself or hire a professional, understanding these preparation techniques is crucial to get the best outcome. Remember, the effort put into preparing your home’s exterior will pay off in the form of a beautiful, durable finish that will stand the test of time. So, take the time to prepare properly, and you’ll be rewarded with a paint job that both looks great and protects your home for years to come.
FAQs
To prepare your house for exterior painting, start by fixing any imperfections in the surfaces using a repair compound that is suitable for outdoor use. Once the compound is dry, sand the surface to create a smooth base. Next, remove any old caulk and apply new, paintable exterior caulk around doors, windowsills, and other areas that need sealing.
Before painting, it is advisable to clean the exterior walls with Trisodium phosphate (TSP). This powerful cleaner not only cleans the walls but also helps to remove the gloss from existing paint. Remember to wear eye protection while mixing TSP with water. Start cleaning from the top of the wall and move downwards, ensuring to rinse off any residual cleaner thoroughly.
To paint your house like a professional, follow these top tips: Wait for dry weather conditions before starting your paint job. Conduct a thorough visual inspection and prepare the surfaces well. Invest in high-quality brushes, roller covers, and painter’s tape. Choose the right nap for your rollers. Protect areas that you do not want painted. Remove all light switch and outlet covers. Apply a primer to the surfaces before painting, and box your paint to ensure color consistency.
When dealing with exterior painting, it is generally recommended to apply a primer before adding new paint, especially if the surface is new, the old paint is deteriorating, or there is a need for enhanced color coverage. Priming helps in achieving a smoother and more uniform appearance.


