About home’s color
The transformative power of a fresh coat of paint is undeniable, offering an instant refresh to any space within a home. The decision to refresh painting in one’s home is more than just a change; it’s an investment into the comfortable and pleasing esthetics of living spaces. Choosing the right paint color, whether you aim for bold colors to energize a room or a subtle color palette for a calming ambiance, significantly influences the perception and mood of any given space. Beyond color selection, the type of paint applied to walls, floors, cabinets, interior doors, and trim also plays a critical role in achieving desired results, marking the importance of paint in home renovation projects.

This article will guide readers through key considerations and steps to refresh painting in their homes effectively. We will start by discussing how to choose the right colors that align with the desired mood and atmosphere. Preparation of the space before painting is crucial for achieving a professional finish, and tips for this phase will be covered. For those who are new to painting, DIY painting projects for beginners will provide a solid starting point. The journey into refresh painting will also explore advanced painting techniques for those ready to take their skills to the next level. By the conclusion, readers will be equipped with the knowledge to confidently refresh their living spaces through painting, transforming their homes one stroke at a time.

Choose the Right Colors
- Taking Photos for Inspiration
Many individuals find inspiration for their home’s color palette through images on platforms like Pinterest or Instagram. An effective method to determine the closest paint color match from an image involves using a color picker tool. Once the desired color is identified in the image, one can copy its hex code and use websites like Encycolorpedia or Easy RGB to find the corresponding paint color. However, it’s crucial to remember that images online may be enhanced with filters, potentially altering the true color.
- Opt for Neutral Tones
Selecting the right neutral tones can significantly affect the atmosphere of a room. Neutrals are not just limited to whites and beiges; they include a variety of types that can add depth and interest. The perception of color can vary greatly depending on the lighting of a room, making the choice of neutrals particularly sensitive to environmental factors. For instance, lighter neutrals can make small spaces appear larger, whereas darker tones add a sense of coziness to larger areas. It is always advisable to test paint samples in the intended environment to ensure they complement the space effectively.
- Limit Bold Colors
While bold colors can make a dramatic impact, they should be used carefully to avoid overwhelming a space. One strategy is to confine bold colors to smaller areas or accent pieces, which can be changed easily without committing to a full room redesign. This approach allows for flexibility and experimentation with different hues without significant commitment. For those looking to incorporate bold colors more extensively, maintaining a balance with neutral shades and consistent elements throughout the home can create a harmonious and sophisticated environment.
Preparing Your Space
- Gather All Necessary Supplies
Before diving into the painting process, it’s crucial to gather all necessary supplies to ensure a smooth and efficient workflow. Essential items include drop cloths and plastic sheeting to protect floors and furniture, painter’s tape for clean lines, furniture covers, and protective films for delicate surfaces. Starting with these preparations sets the stage for a successful painting project by safeguarding your belongings and creating a clean working environment.
- Protect Your Floors and Furniture
Protecting floors and furniture is paramount when refreshing your home’s paint. Use heavy-duty canvas drop cloths for hardwood floors and plastic sheeting for carpets to prevent any paint spills and splatters. Secure the edges with painter’s tape to avoid slipping or tripping hazards. For furniture, it’s advisable to either remove it from the room or cover it comprehensively with drop cloths or plastic, ensuring all surfaces are well protected against potential paint damage.
- Repair and Clean Walls
To achieve a professional-quality finish, start by repairing any imperfections in the walls such as holes, cracks, or dents. Use spackle for small repairs and joint compound for larger areas, ensuring each layer is dry before sanding smooth. Cleaning the walls is equally important; remove dust, dirt, and grime with a duster or a damp cloth depending on the surface type. In kitchens or areas with greasy walls, a solution of trisodium phosphate (TSP) will effectively degrease and prepare the surfaces for painting. This meticulous preparation prevents future paint failures and ensures the longevity of your paint job.
DIY Painting Projects for Beginners
- Painting Trim and Doors
For those new to DIY painting, starting with trim and doors can be an excellent first project. It’s important to use semi-gloss or gloss paint for these areas as they are easier to clean and maintain compared to flat or eggshell finishes. Before painting, ensure all gaps are filled with caulk for a seamless appearance. The process involves brushing all areas first, then using a roller to smooth out the paint on flat surfaces. This method helps avoid the need for excessive touch-ups and ensures a professional finish.
- Creating a Feature Wall
Creating a feature wall is a straightforward project that dramatically alters the ambiance of any room. Beginners can start with simple color-blocked designs using painter’s tape to ensure crisp, clean lines. For a more dynamic effect, consider using stencils or large-scale patterns. It’s vital to use a primer before painting to enhance the paint’s adherence and cover any underlying stains or discolorations. Each coat should be allowed to dry thoroughly before applying the next, ensuring a durable and visually appealing finish.
- Refurbishing Furniture
Revamping old furniture is not only economically efficient but also allows for creative expression. Start by cleaning and sanding the piece to remove any old paint or finish. Applying a primer is crucial as it helps the new paint adhere better and prevents peeling. For a smoother finish, sand lightly between each coat of paint. Once the final coat is dry, sealing the furniture with a water-based sealer or furniture wax can protect the paint and give the piece a polished look. This project is perfect for beginners looking to personalize their space without undertaking a massive renovation.
Each of these projects offers a unique way to enhance one’s living environment while developing DIY skills. By following these guidelines, beginners can achieve results that they can be proud of and that will last for years to come.


Advanced Painting Techniques
-
- Creating Decorative Bedheads
One of the most budget-friendly and impactful DIY projects is creating a custom painted headboard. This technique requires minimal effort and skill, transforming a bedroom without taking up physical space. Using painter’s tape, individuals can design headboards in various shapes and sizes, from standard rectangles to elaborate curves. A small paint roller and a two-inch brush ensure a neat finish, with two coats of paint usually sufficient to complete the project. This approach is particularly advantageous for renters, as it involves a minimal area that would need repainting upon moving out.
-
- Upcycling Outdoor Pieces
Revitalizing outdoor furniture with paint can breathe new life into weathered pieces. Techniques like painting bright colors on repurposed chairs or adding painted details such as a French linen pattern on table runners enhance the charm of garden spaces. For timeless styles like Adirondack chairs or Shaker-style benches, a fresh coat of paint can make them feel brand new, ensuring their longevity in outdoor settings.
-
- Painting Archways
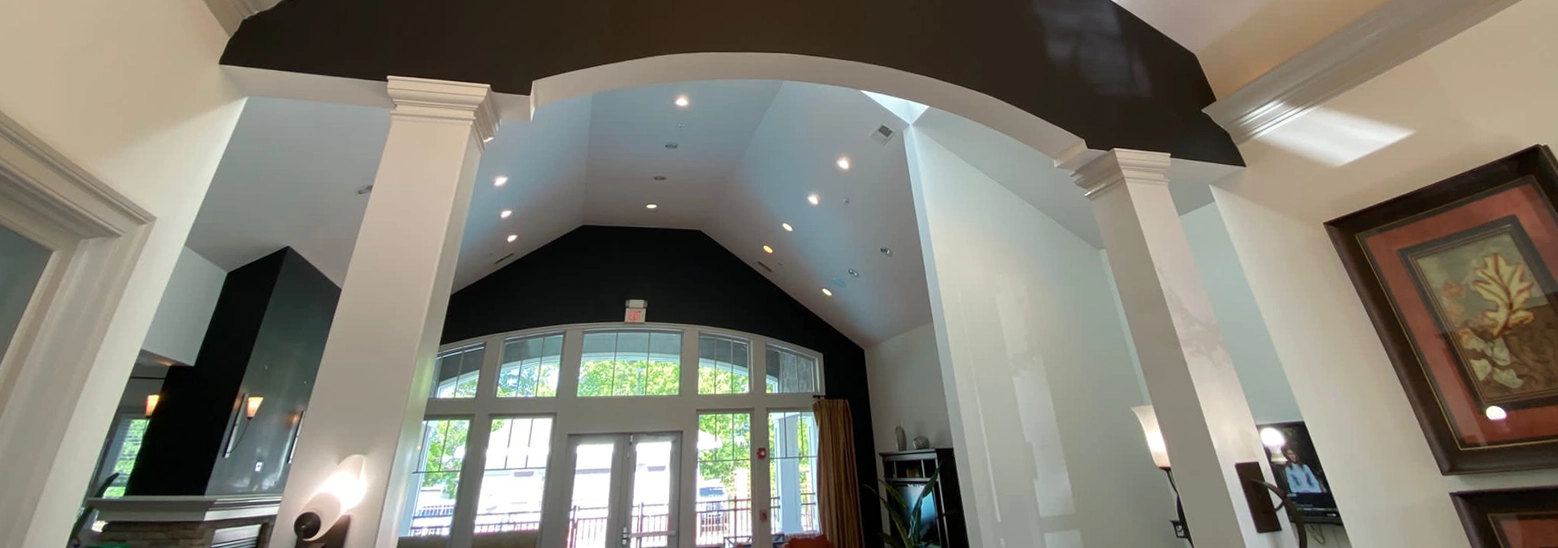
Painting archways can add architectural interest and personality to a room. The process starts by determining the arch’s position and width, often using tools like a spirit level to ensure symmetry and precision. A DIY compass can be crafted with string and a pencil to draw perfect curves. For a flawless finish, it’s advisable to paint carefully around the edges with a brush before filling in with a roller. The final step involves carefully removing the tape to reveal a smooth, professional-looking arch, which can dramatically alter the ambiance of the space.
Conclusion
Through this article, we’ve embarked on a comprehensive journey detailing the transformative impact of painting in refreshing one’s living environment. From selecting the perfect color palette that aligns with the desired mood and atmosphere to the intricate steps of preparing the space and executing various painting projects, we’ve covered essential strategies to empower homeowners to revitalize their spaces confidently. The emphasis on choosing the right colors, coupled with practical tips for DIY projects for beginners and advanced painting techniques, not only underscores painting’s esthetic benefits but also its role in personalizing and enhancing the comfort of our homes.
The exploration of innovative painting projects—from creating decorative bedheads and revamping furniture to upcycling outdoor pieces—illustrates painting as a versatile and accessible tool for home improvement. These endeavors not only enrich the beauty and functionality of our living spaces but also foster a deeper connection and pride in our surroundings. As we conclude, remember that the power of paint in transforming a home is limited only by one’s creativity and willingness to experiment. With the knowledge and tips shared, readers are well-equipped to embark on their painting projects, ready to infuse their homes with fresh energy and style.
FAQs
To give your home a refreshed look, consider painting smaller elements such as stairs, handrails, trim, molding, and doors. These often overlooked details can significantly impact the overall esthetic of your home, making it appear more polished and well-maintained.
There are several budget-friendly strategies to refresh your home:
- Perform a thorough deep cleaning.
- Declutter spaces to create a more open, inviting environment.
- Update your curtains for a fresh look.
- Rearrange your furniture and wall decor to change the dynamics of your rooms.
- Touch up your baseboards to brighten the space.
- Create a statement wall or revamp an old piece of furniture to add character.
Here are eleven straightforward methods to enhance your living space:
- Apply a fresh coat of paint to revitalize any room.
- Experiment with bold colors.
- Invest in comfortable, high-quality bedding.
- Organize and decorate your shelves.
- Improve lighting fixtures to brighten the room.
- Set up a gallery wall for visual interest.
- Add fresh flowers throughout your home.
- Upgrade your window treatments with luxurious drapes.
If you prefer not to paint, consider these alternatives to enhance your walls:
- Use traditional or removable wallpaper.
- Install wall murals or decorative panels.
- Hang fabric or curtains for texture and color.
- Add blinds or other window dressings.
- Decorate with tapestries to add a unique artistic touch.


